Powering your NMEA 2000 network

Powering your NMEA 2000 network shouldn’t be a chore or a difficult task, but there are various things to consider during the planning stage, which will save you a lot of time when it comes to doing the installation. Whilst this article can’t cover everything it will cover some of the fundamentals.
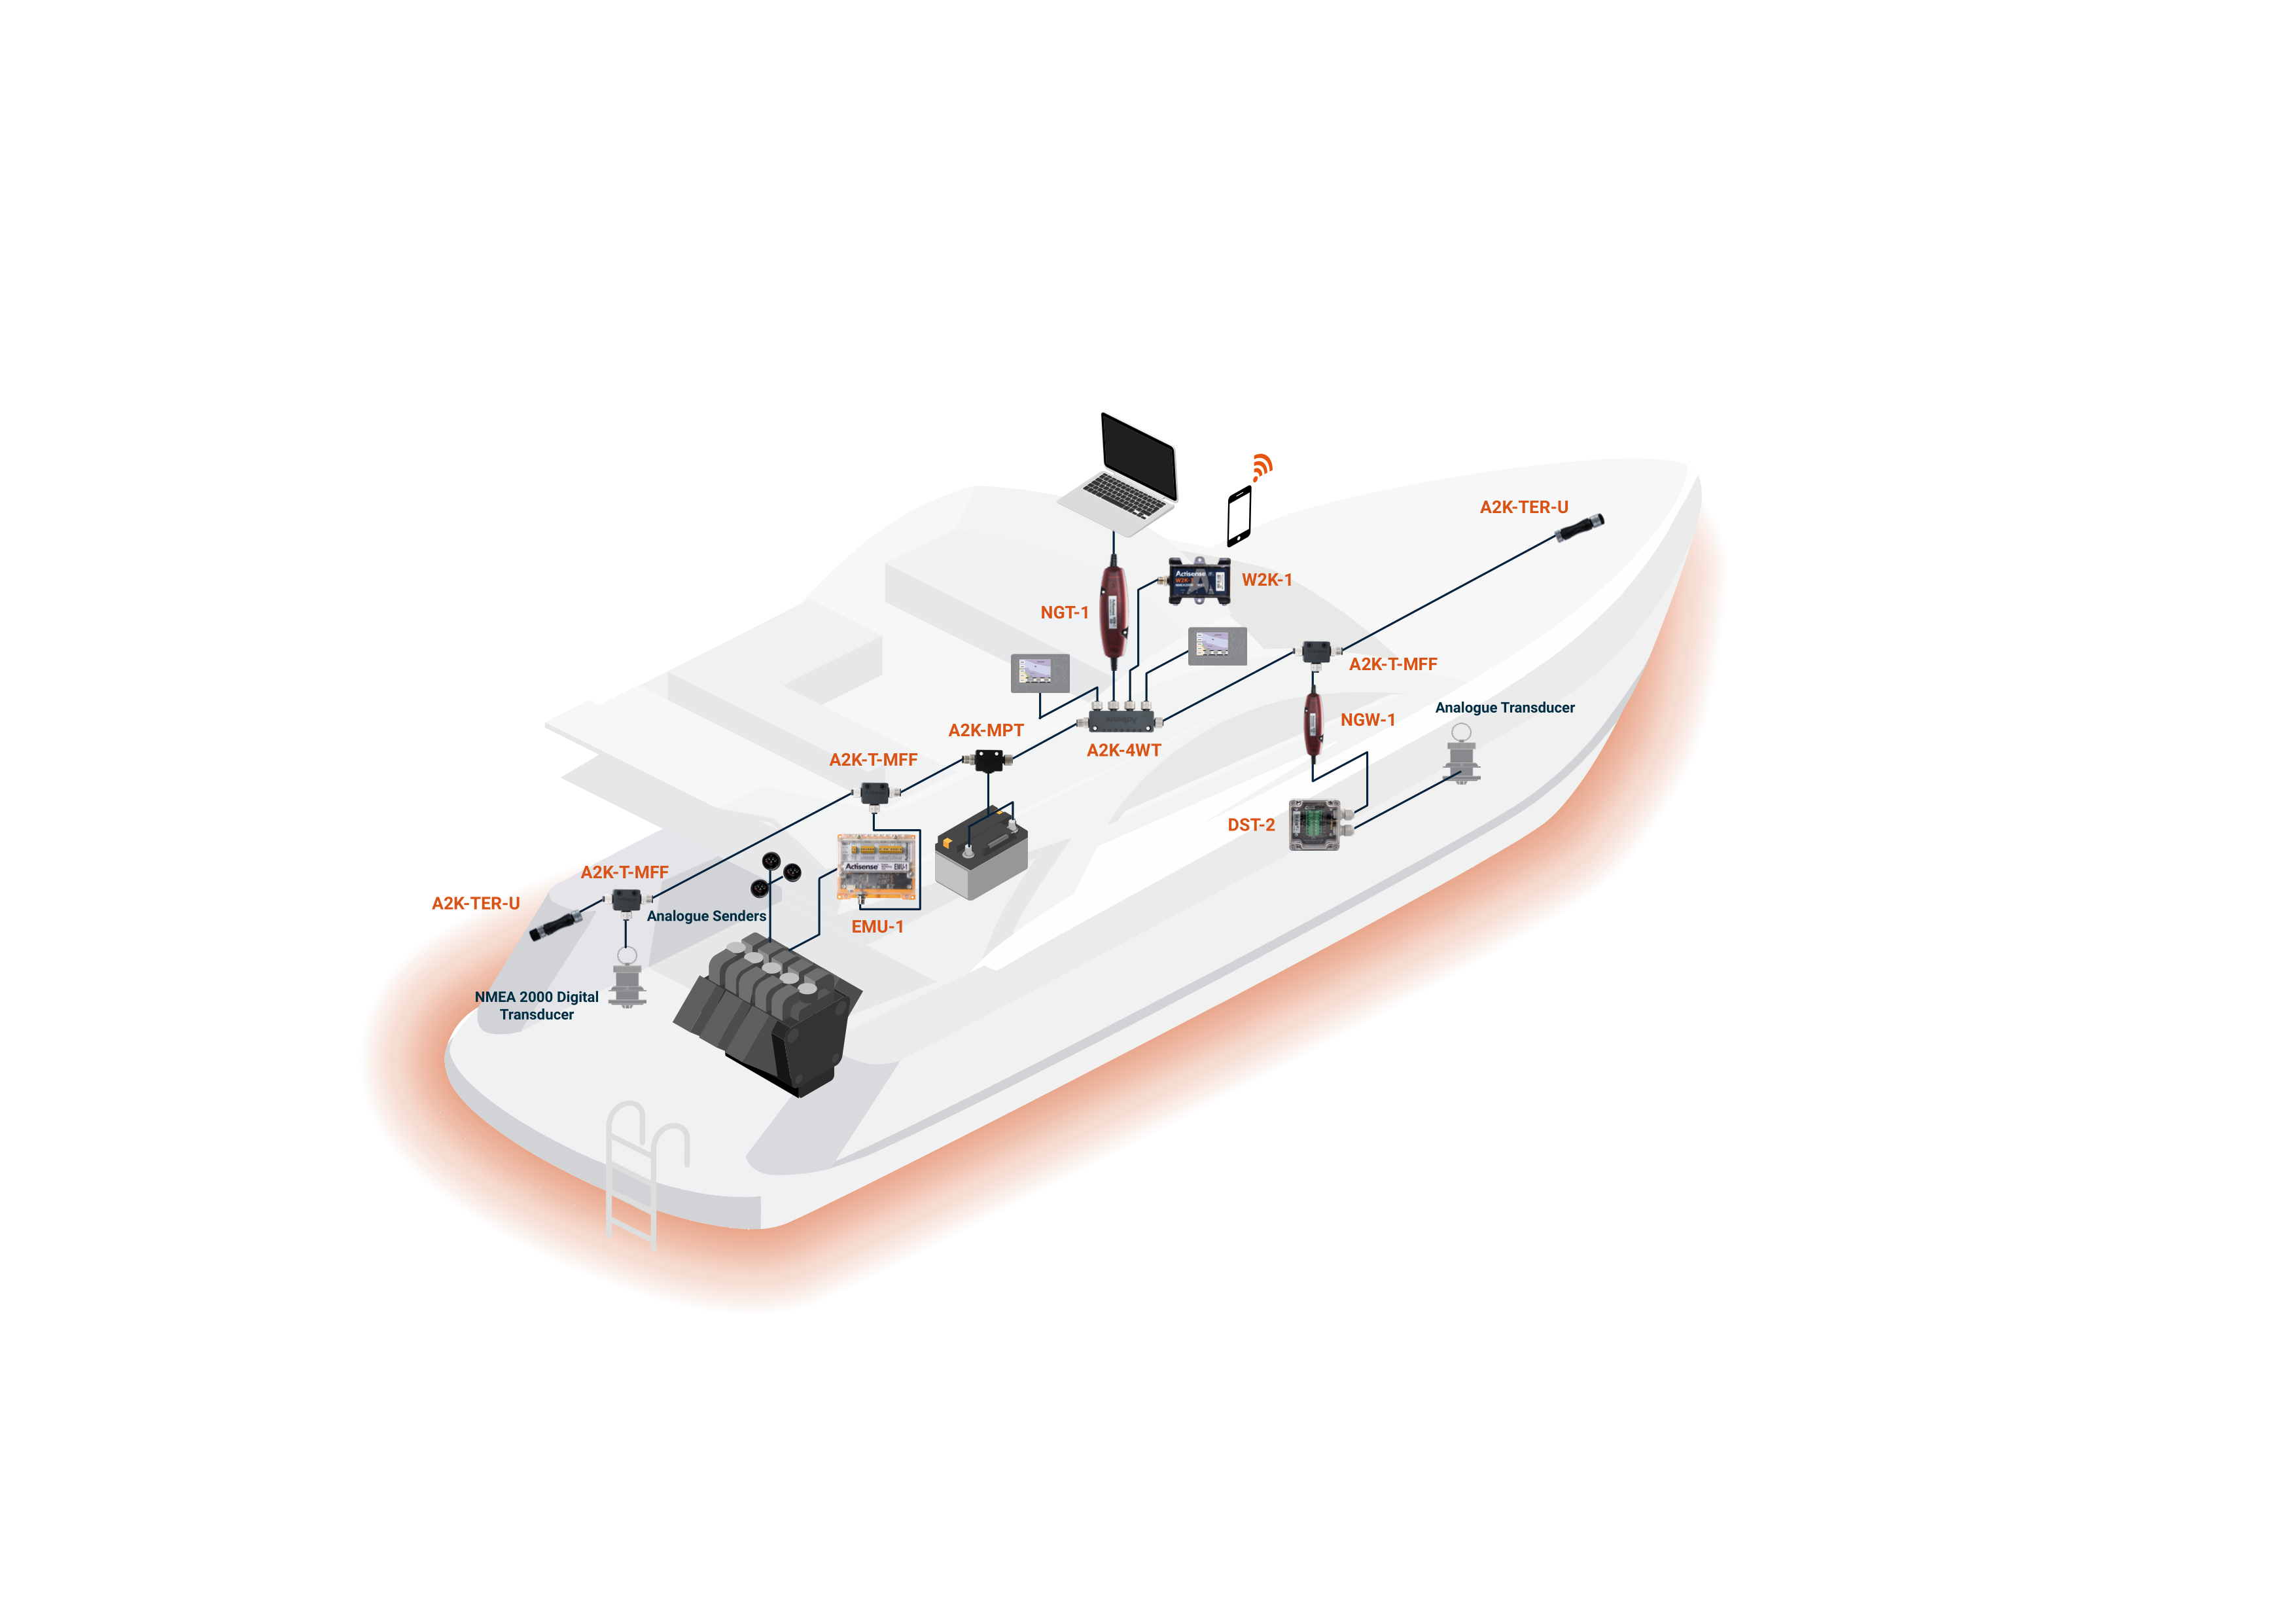
So, how do you power your NMEA network? The first and arguably most important thing is a network diagram, which details all cables, connectors, and devices that will be on the network.
The diagram doesn’t need to be too scale, or precise and a hand-drawn diagram will be sufficient, however, the diagram is necessary to do any voltage drop calculations when considering power implementation.
At a minimum, the diagram must include cable lengths, power insertion location(s), LEN (Load Equivalency Numbers) of each device, and the single shield wire location that is connected to the Vessel’s RF Ground.
Understanding Load Equivalency Numbers (LEN)
LEN is a way of representing how much current a device draws from the network, and every certified NMEA 2000 device has a LEN, which should be published by the manufacturer in the device documentation. You need this value to perform voltage drop calculations, as this is done using Ohms Law.
1 LEN is 50mA, thus 20 LEN is 1A. This is important, as any device which is over 20 LEN (1A), should not be powered from the NMEA 2000 network, and requires its own independent power supply. Devices such as MFDs are commonly run from their own power supply, due to their high power nature.
In principle, the higher the LEN, the higher the voltage drop, and typically higher LEN devices are placed closer to the power insertion point on the network, to minimize cable length, which in turn reduces voltage drop.
Power insertion point(s)
NMEA 2000 devices require 9-16VDC (Some are rated to 24V such as ours, to allow for 24V supplies on large networks if all devices are rated to this).
Alongside this, every NMEA 2000 device is somewhat powered from the bus; Each device contains an NMEA 2000 transceiver, which takes it’s power from the bus. This means that even high current pull devices such as displays which are over 1A, they are fundamentally powered from the bus, but the independent power supply is required for things like the screen etc.…
There are a number of different NMEA 2000 power source options, which include:
| Source | Voltage (varies by manufacturer) |
| Ships battery connection | 12.6 VDC |
| Multiple Power Supplies | 13.8 VDC (same make) |
| AC to DC Supply | 13.8 VDC |
| DC to DC Supply | 13.8 VDC |
Where the power is inserted into the network depends on the installation design. If a power tee is being used that is capable of powering both left and right sides of the backbone individually, then ideally the NMEA 2000 power cable will be placed in the middle of the network.
However, if you have more high-power devices at one end, it would make more sense to locate the power tee closer to these devices. Some small networks do not require a power tee, and can be powered from one end through a single power cable (drop cable) and a 4-way tee for example.
This highlights the purpose of the network diagram created before the install is started because it will allow you to determine where the power insertion point should be.
On large networks with a high volume of devices, more than one power insertion point may be required to keep the voltage above 9V on the bus.
An ideal product for power insertion is the Actisense MPT-2 (Micro Power T-Piece), which can power both left and right sides of the backbone, and comes with two female connectors to comply with DeviceNet standards.
NMEA 2000 power cable wiring – The MPT-2 has 2 pairs of wires and a shield. One pair is red and black, the other is red/white and black/white to differentiate between the left and right side power connections.
Your network should only ever be grounded at one place. Having multiple grounding locations can cause ground loops which can interfere with device communication on the network. Ensure that the correct fuses are used on the power connection, which is sufficiently rated for your supply.
One quick and easy way of telling if your network is correctly powered is by using our Smart terminators (A2K-TER-U). These intelligent terminators have built in LEDs, which change colour to indicate the voltage level on the backbone using the built in high accuracy voltage monitoring circuitry. If it detects that the voltage is within the minimum required range, it will indicate ‘GREEN’ immediately, providing continuous valuable feedback as to the state of the bus.
If the voltage falls below the minimum required level of 9.0V, then the LED’s will illuminate ‘RED’, showing there is a potential problem with the NMEA 2000 bus power. Similarly, if the LED’s do not illuminate at all, this would indicate that there was no power or that the polarity was incorrect. This monitoring function happens continuously and remains permanent.
Using these terminators means that a brief visual check can be done as the top level of diagnostics for any power issues on a network, as the LED will indicate if there is low voltage or incorrect polarity, saving you on your installer the time and effort of disconnecting the terminators and using a multimeter.
For more information on how to build the perfect NMEA 2000 network download our FREE E-guide.
